Windows
Setup types
There is one Windows installer, Capture.Edge_Install_<version>_win-x64.exe. On the Select Components page you choose a setup type: Full installation or Custom installation.
| Component | Full installation | Custom installation |
|---|---|---|
| Collector | Installed | Optional |
| Influx-1.8.3 (InfluxDB) | Installed | Optional |
| Redis | Installed | Optional |
| Syncer | Installed | Optional |
| Analytics | Installed | Optional |
| CloudManager | Installed | Optional |
| EdgeApi | Not installed | Optional |
| .NET Runtime | Always installed | Always installed |
| ASP.NET Core Runtime | Always installed | Always installed |
| Add private network firewall exception for cloud manager | Not installed | Optional |
| Add private network firewall exception for edge api | Not installed | Optional |
The CloudManager component is always needed to run Capture. The .NET Runtime and ASP.NET Core Runtime are fixed: the Capture services do not start without them, so you cannot clear them. EdgeApi and the two firewall exceptions are only available in a custom installation. If you change any checkbox while Full installation is selected, the setup type switches to Custom installation.
The firewall exceptions add inbound Windows Firewall rules. The CloudManager option opens TCP port 5004. The EdgeApi option opens TCP port 5005 (CaptureEdgeApi, the EdgeApi itself) and TCP port 18830 (CaptureEdgeApiMqtt, its MQTT relay). Despite their labels, the rules are not limited to private networks: they apply to every network profile. The uninstaller removes them. None of these ports checks who connects, so read Optional firewall settings before you open any of them.
There is no ADS Runtime component. The Collector runs its own ADS router, so ADS logging needs nothing extra.
Installer package structure
The installer package contains the capture installer executable and an optional default configuration file. On a new device, if you run the installer without the configuration file, the logger will start the provisioning flow with the Vintecc company. (This is the default config) If you want the logger to start the provisioning flow with your company, a Config.json file with your company name in the placeholder is needed. It is possible to download the installer and default Config (or a selected one) from the Docs section in the cloud platform. Selecting "Default" as config will generate an empty config with your company name already filled in. (based on the company of the logged in user) 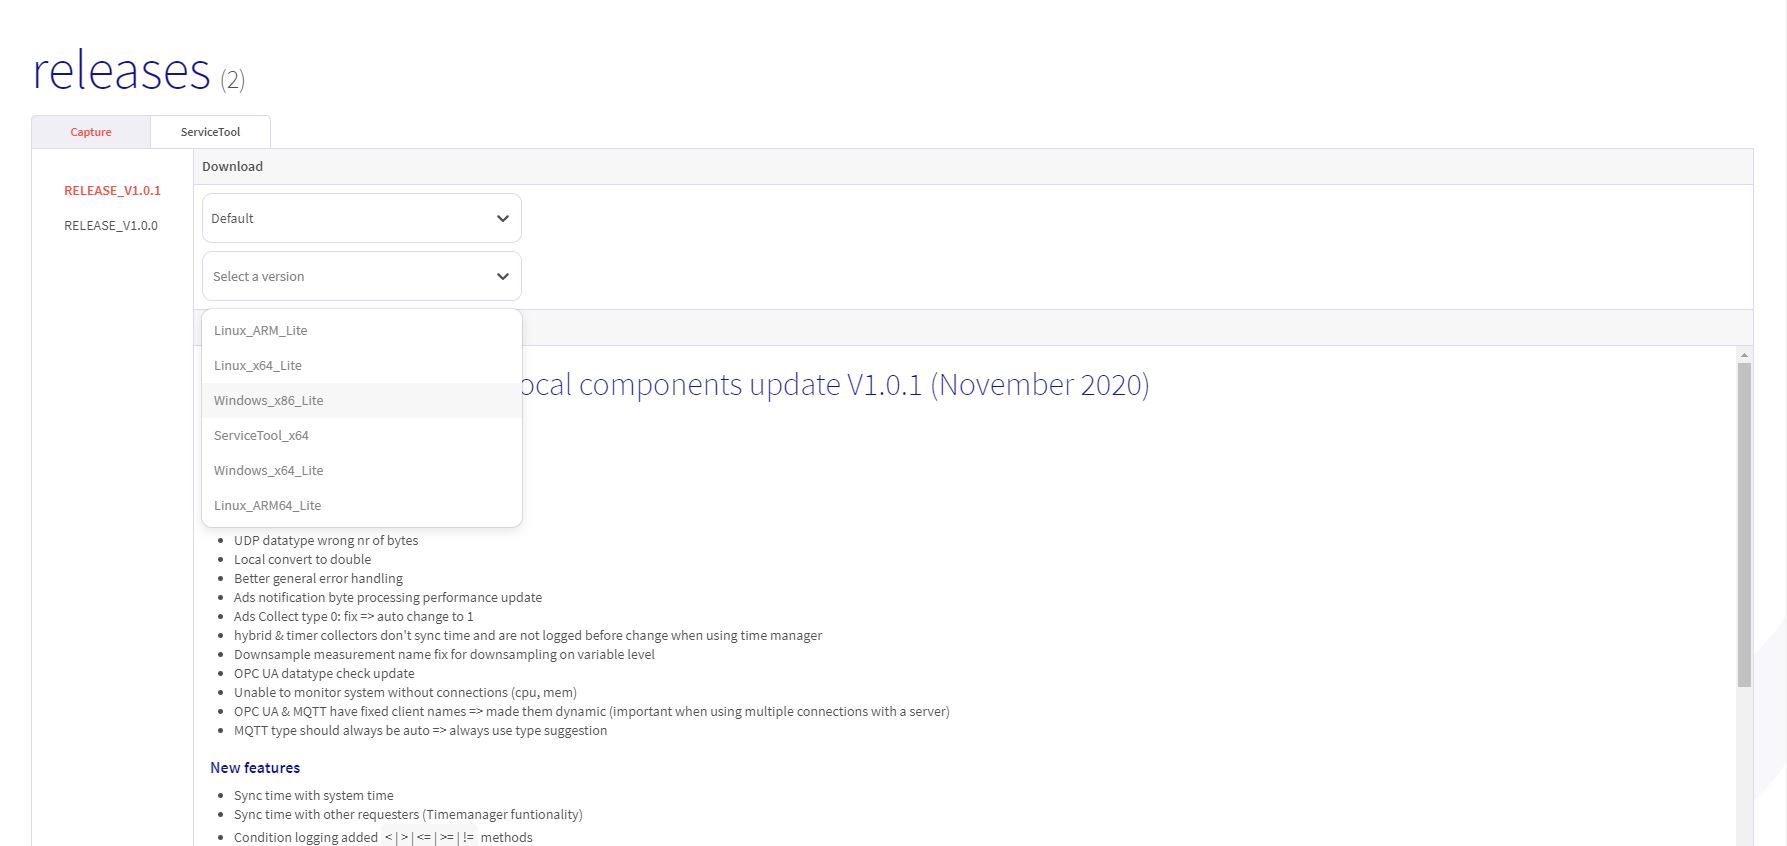
Installation
Put the config file for your company in the same folder as the installer, then run the installer. It needs administrator rights. On a new device, the installer copies the config file to C:\ProgramData\Capture\Config\Config.json, and Capture Edge starts with it.
Once Capture Edge has started on a device, it runs the configuration it stored in C:\ProgramData\Capture\DataStore, and running the installer again keeps that configuration. The installer then leaves a Config.json next to it alone, and says so in its setup log, %TEMP%\Setup Log <date> #<n>.txt. This also holds after an uninstall, which keeps C:\ProgramData\Capture\DataStore.
To change the configuration of a device that has run before, use the Configuration page in the CloudManager UI, restore a snapshot on the Configuration Backups page, or change it in the Capture portal.
The installer does not ask for an installation folder. Capture is always installed in C:\Program Files (x86)\Capture.
The config file must be named Config.json. Rename the file if this is not the case.
1. Select the setup language
Choose English, Dutch, French or German, then click OK. Click Next on the welcome page.
2. Influx data location
Choose where InfluxDB stores its data. The default is C:\var\lib. When you update an existing installation, the installer suggests the location that installation uses, so keep it to keep your data.
The installer saves the location in C:\Config.env and in the system environment variable CAPTURE_INFLUX_DATA_DIR. This page appears before you choose the components, so it is also shown when you will not install InfluxDB.
3. Select components
Select a setup type and the components you want to install. See Setup types. 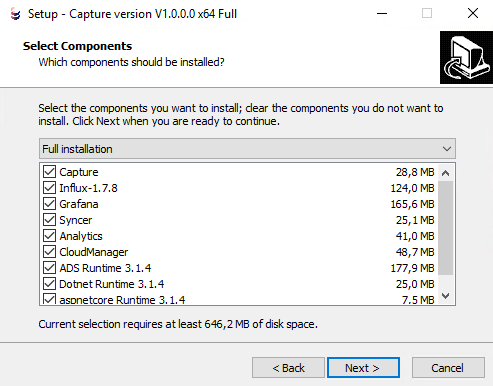
4. Start the installation
Check the summary and click Install. 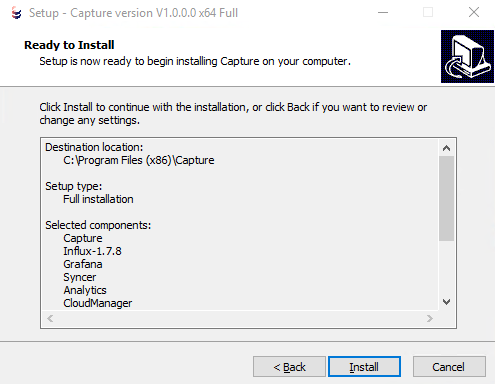
When you update an existing installation, the installer first stops the Capture services. If one of them does not stop, the installer shows which one and stops before it replaces any file. Reboot the device and run the installer again.
5. Wait for the installation to finish
The installer installs the .NET Runtime and the ASP.NET Core Runtime in the background. If they are already installed, nothing changes. It then registers and starts a Windows service for each component you selected.
At the end, a Capture Postinstaller window shows its progress while it finishes the setup and restarts the services. Wait until it closes, then click Finish.
The installer stops the Windows Update service (wuauserv) and sets its startup type to Disabled. If the device must receive Windows updates, enable the service again in Services after the installation.
Uninstall
To uninstall Capture on a windows device, open Settings → Apps, select the Capture entry and click Uninstall. You can also navigate to the installation folder, C:\Program Files (x86)\Capture, and double click the unins000.exe file to start the uninstallation process. 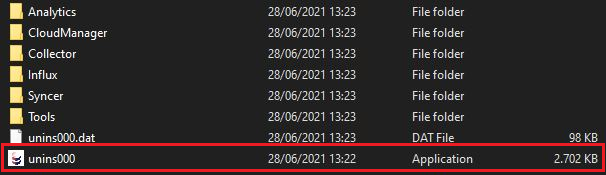
The uninstaller stops and removes the Capture services, removes the firewall rules, the installation folder and C:\Config.env.
Some data in Capture is still stored on your pc after an uninstall. This means that an accidental uninstall will not harm your data. The files that are kept are:
C:\ProgramData\Capture, exceptConfig\Config.json, which the uninstaller removes. The configuration the device was running stays inDataStore, so a reinstall comes back with that configuration, not with the default one or aConfig.jsonnext to the installer.- The InfluxDB data, in the location you chose on the Influx data location page (default
C:\var\lib)