Configuration
Left Sidebar
A vertical navigation menu appears on the left side with the following sections:
- General (selected)
- Scheduling
- Variables
- Content
- Styling
- Notifications
A back arrow is displayed at the top left, allowing navigation back to the previous page.
General Section
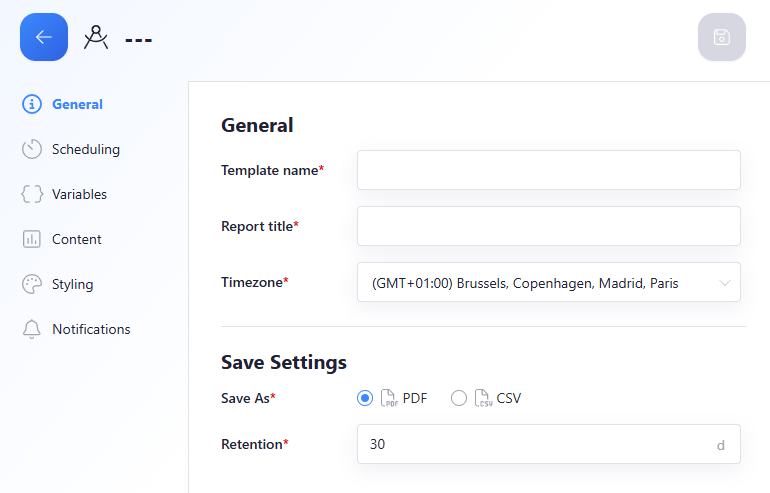
The main panel displays form fields under the General heading:
-
Template name* The name of this report template.
-
Report title* The title that will be shown on the generated report.
-
Timezone* This ensures that all time-based values on the report are shown in the selected timezone. A dropdown menu allows selecting a timezone.
Below the general fields, a Save Settings section is shown:
-
Save As* If you want to save the report as a pdf (printable format) or as a csv (spreadsheet format), you can select the desired format from this dropdown menu.
-
Retention The report will automatically be deleted after the selected retention period. Editing the retention will not affect already generated reports.
Scheduling Section
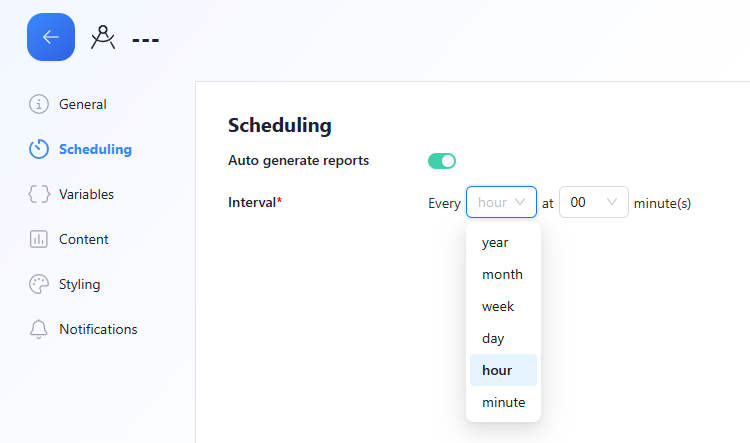
The main panel displays the Scheduling configuration options, allowing automatic generation of reports.
- Auto generate reports
This toggle enables or disables automatic report creation. When switched on, the system will generate reports at the specified interval.
Interval Options
Depending on the selected interval type, the interface will show different scheduling fields. Below are all possible configurations.
Yearly Interval

When selecting year, the report can be scheduled on a highly specific yearly pattern.
- Every year — Defines an annual schedule.
- In — Select the month(s) of the year.
- On — Select the days of the month.
- And — Select the days of the week.
- At — Select the exact hour and minute at which the report should be generated.
Monthly Interval

When selecting month, the report supports detailed monthly scheduling.
- Every month — The report runs once per month.
- On — Selects which days of the month it should run.
- And — Specifies which weekdays it should run.
- At — Allows selecting the hour and minute for execution.
Weekly Interval
![]()
When selecting week, the report is generated on a weekly schedule.
- Every week — The report repeats weekly.
- On — Selects which days of the week the report should run.
- At — Selects the hour and minute for execution.
Daily Interval
![]()
When selecting day, the report can be generated every day at a specific hour and minute.
- Every day — The report runs once per day.
- At — Allows selecting the hour and minute at which the report should be generated.
Hourly Interval
![]()
When selecting hour, the report is generated once every hour.
- Every hour — Defines an hourly schedule.
- At — Select the minute at which the report should run every hour.
Minute Interval
![]()
When selecting minute, the report is generated continuously at the chosen minute frequency.
- Every minute — The report runs once every minute.
Report Variables
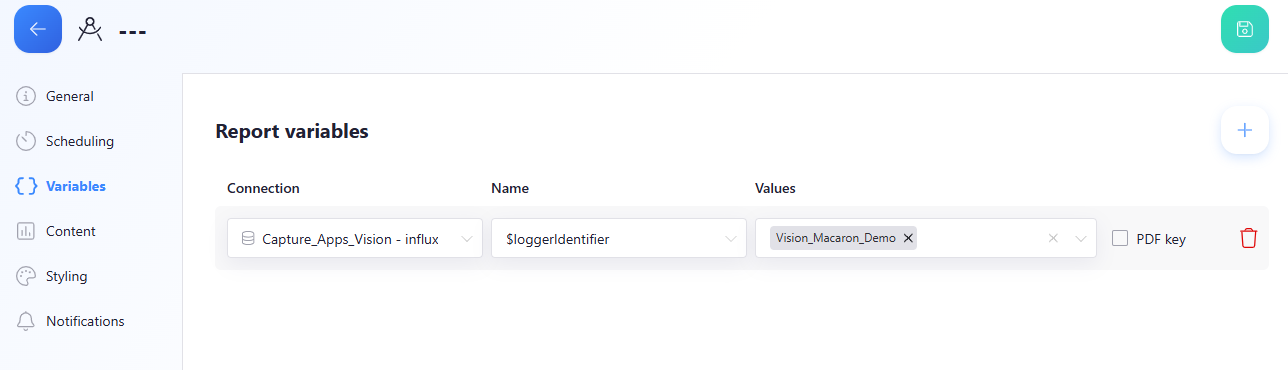
The Report variables section allows you to define dynamic values that will be used inside the report. Each variable consists of a connection, a variable name, and one or more values.
-
Connection
Selects the data source from which the variable will pull its values. In the screenshot, the selected connection is
Capture_Apps_Vision – influx. -
Name
Specifies the variable identifier used inside the report template.
Example shown: $loggerIdentifier -
Values
Allows selecting one or multiple values for the configured variable.
In the screenshot, the value Vision_Macaron_Demo is selected. -
PDF key
A checkbox that marks this variable as a key value for identifying the report when generating a PDF. -
Delete variable
A red trash‑icon button allows removing the variable from the report template.Content Sections
Sections Overview
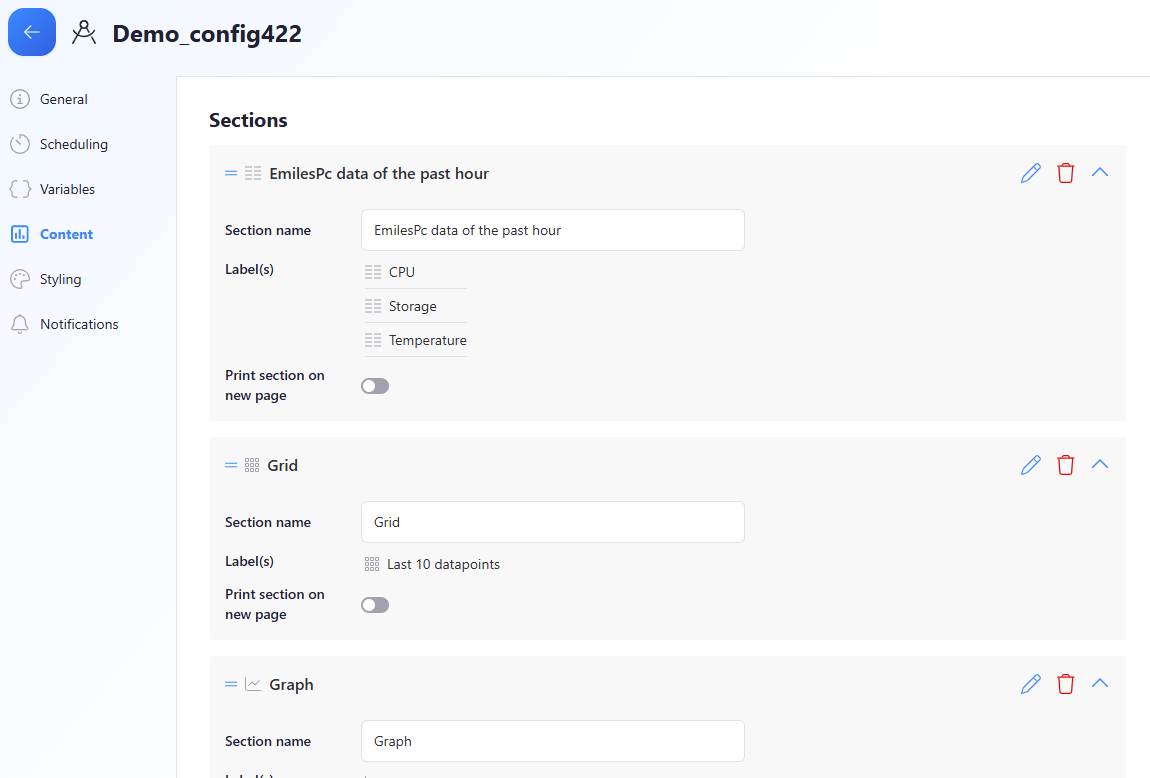
The Content section defines which blocks or components will appear in the generated report.
Each section contains a name, one or more labels, and additional configuration options.
Sections can be reordered, edited, or deleted using the icons on the right side of each section.
You can learn here how to create and customize report sections.
- Section name The name of the section, which is used when collapsing the section.
- Labels Each section can have one or more labels that categorize the content.
- Print section on new page A toggle that, when enabled, forces the section to start on a new page in the generated report.
Move a section
You can reorder sections within the report by dragging the handle icon (≡) located at the top-left of each section.
This allows you to change the order in which the sections appear in the generated report.
Edit a section
Click the edit icon (pencil) on the right side of a section to modify its settings.
This allows you to change the section name, labels, and other configuration options such as whether it prints on a new page.
Delete a section
Click the delete icon (trash bin) on the right side of a section to remove it from the report.
Deleting a section permanently removes it from the template, so use this action with caution.
Styling
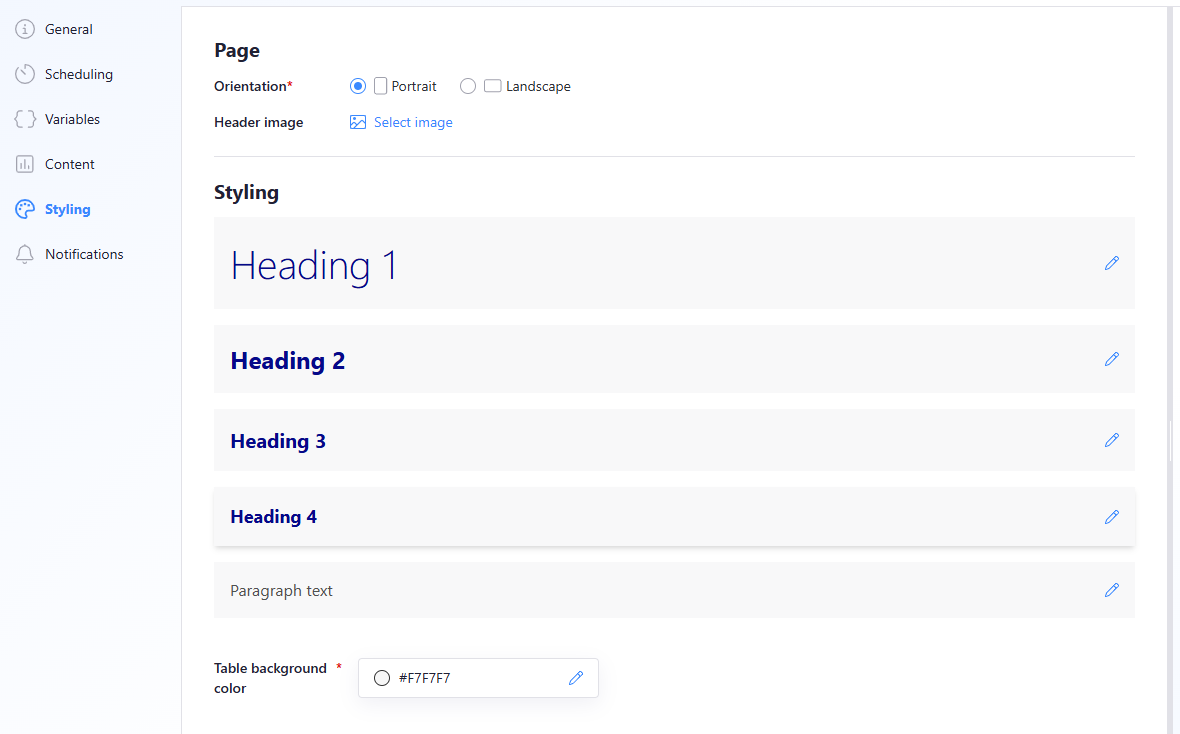
Page Settings
The Page section allows you to configure general page properties for the generated report.
-
Orientation*
Select whether the report should be generated in Portrait or Landscape mode. -
Header image
Allows uploading an image that will appear at the top of every page of the report.
Clicking Select image opens the file chooser.
Styling Options
Below the page settings, you can define how different text elements are styled throughout the report.
-
Heading 1, Heading 2, Heading 3, Heading 4
Each heading level is shown with its default styling.
Clicking the edit icon next to a heading allows customizing its font, size, color, and formatting. -
Paragraph text
Displays the default appearance of paragraph text.
This can also be customized using the edit icon. -
Table background color*
Defines the background color used for table cells inside the report.
A color input field is shown, with the value #F7F7F7 in the screenshot.
Clicking the edit icon opens the color selector.
These styling options allow you to create consistent, branded, and visually aligned reports.
Notifications
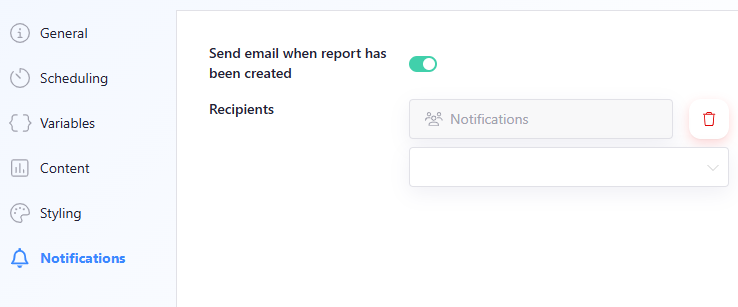
Notification Settings
The Notifications section allows you to configure who should receive an email when a report is generated.
-
Send email when report has been created
This toggle enables or disables email notifications.
When enabled, recipients will automatically receive an email each time the report is generated. -
Recipients
Here you can add one or more user groups that will receive the notification emails.
This only applies to scheduled report generation. Reports generated by alerts or generated manually will not trigger the notification.